A/C condensor cleaning

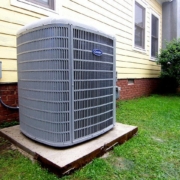
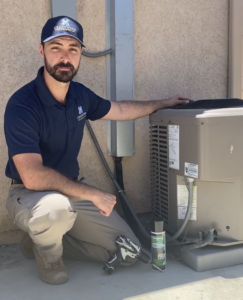
Homeownership comes with so many benefits, but it also takes work such as annual A/C system maintenance. As with most HVAC systems in Southern California homes, you most likely have a split system consisting of an outdoor unit and an inside unit. The exterior unit has an array of tiny coils like a car’s radiator and a compressor underneath a protective cover. The interior side of the system contains another set of small coils called the evaporator coil and the blower motor.

Contrary to popular belief, air conditioning systems don’t actually produce cold air. Instead, they remove heat and moisture from the air and then distribute that now-cooler, drier air throughout the home through distribution ducts. The heat is carried outside by refrigerant through the “line set” to the exterior condenser coils, where the heat radiates into the atmosphere.

A/C system maintenance

A/C system maintenance and cleaning are required to keep everything running efficiently and safely. Having dirty and clogged coils can contribute up to a 30% energy efficiency loss, costing you money all summer long by making your air conditioning system work harder than it should. Some A/C system maintenance should be left to the pros, such as duct cleaning and servicing of the evaporator coils in the interior unit. However, you can accomplish some routine maintenance such as filter replacement and exterior condenser coil cleaning. The coils outside of the house should be cleaned at least once every year, preferably before the summer season.

How to clean your condenser coil unit

There are some basic tools and supplies that you need to clean your coils, such as basic hand tools like a screwdriver or a socket set (it will depend on your individual unit), a can of coil cleaner, and a garden hose.

Safety first

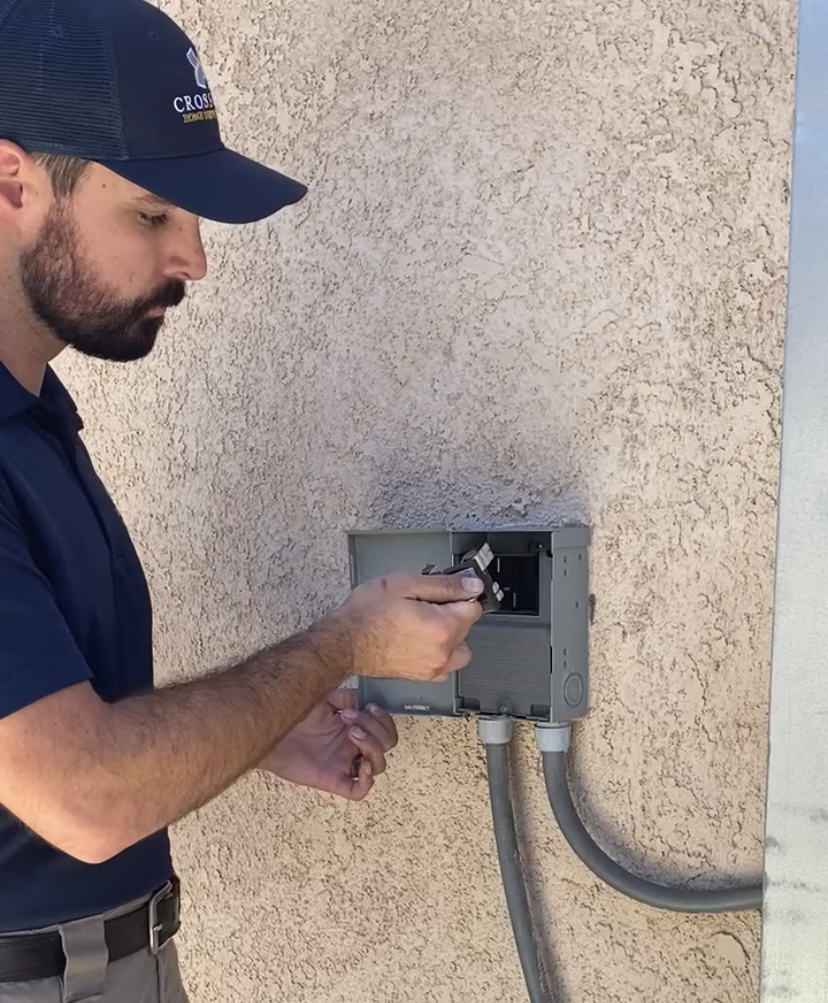
Most importantly, it would be best if you work safely. Adjacent to the A/C unit is a little box with a conduit connected to it- this is your service disconnect. The service disconnect acts as a circuit protection device and a safety disconnect to protect those working on the system. With the air conditioner not running, open the cover and pull out the disconnect. Pulling the disconnect will make sure the air conditioning system does not start running while you have it opened up.

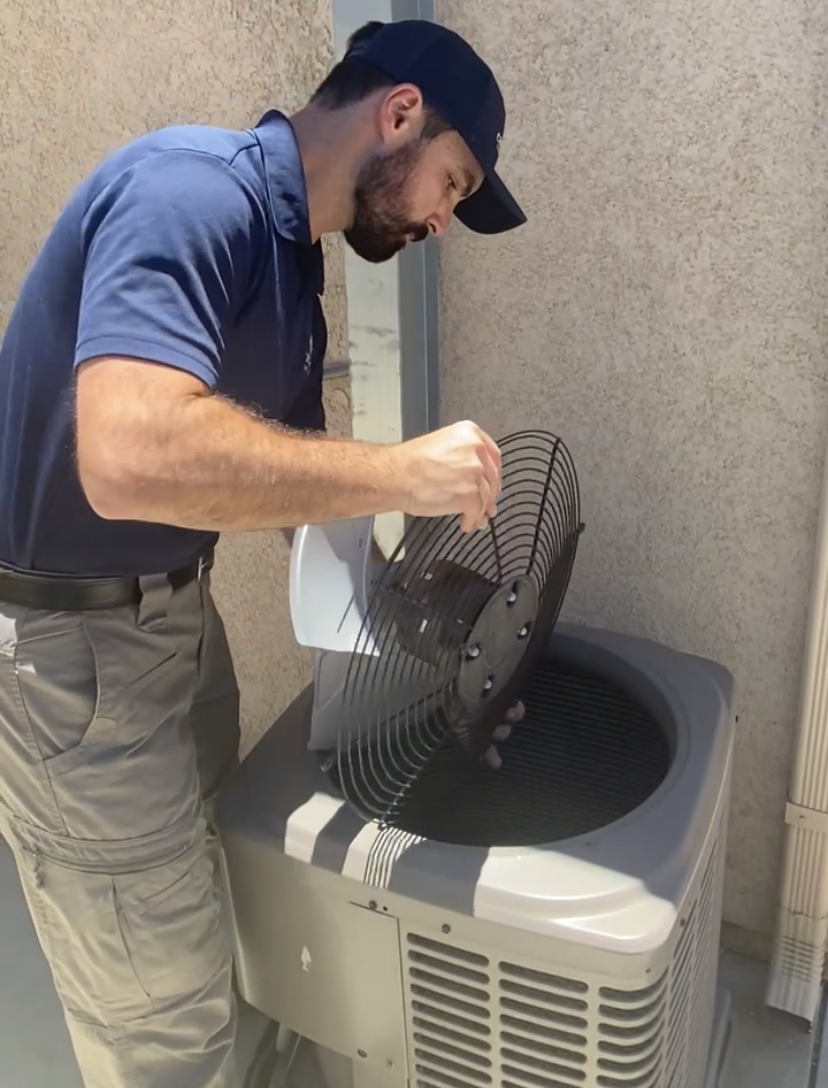
Remove the condenser cover and flip the motor out of the way.

Next, grab your hand tools and remove the fasteners that are securing the top cover and motor. Remember to put the fasteners in a safe place so you don’t lose them, and gently lift the cover and motor up and out of the way. This is how you will gain access to the condenser coils for cleaning. Be sure not to put any stress on the electrical wires attached to the motor when you set it aside.

Use the coil cleaner and a garden hose to wash away built-up debris

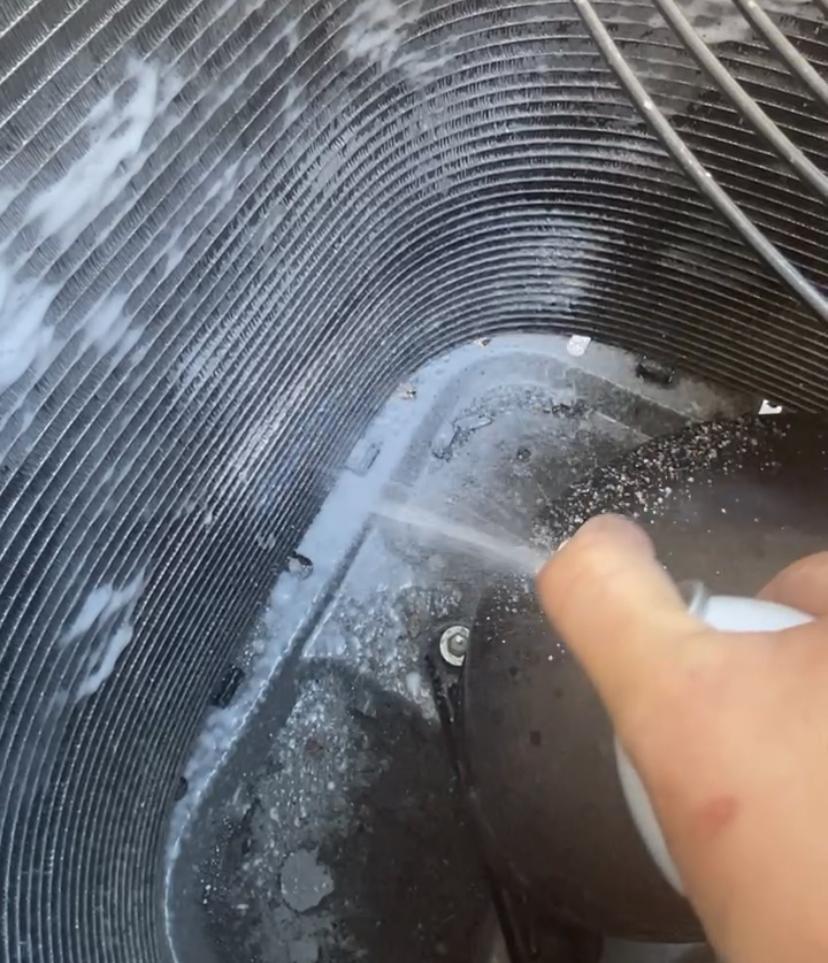
Take a look at the inside and gently remove any large debris like leaves collected at the bottom.  Be careful not to bend the tiny fins of the coils as they are very delicate and easily damaged. Grab your can of coil cleaner and thoroughly spray the inside surfaces of the coils; go ahead and use the whole can. The coil cleaner is specially formulated to gently lift and dissolve any built-up dirt deposits without damaging the coils. After about 20 minutes of soaking, gently flush the cleaning solution through the coils with a garden hose; do not use a high-pressure stream, remember the fins are delicate, and we want to flush the dirt away gently.

Reassemble the unit by putting everything back together in the reverse order in which you took it apart. Flip the fan and motor assembly back over, set it in its place, and install and tighten the screws or bolts that hold the cover in place. Next, reinstall the service disconnect fuses and close the cover. Lastly, go inside to the thermostat and turn on the air conditioning system to make sure everything functions properly. Congrats! You have now singlehandedly improved the efficiency of your air-conditioning system!

Repair verification inspections as part of a buyers due diligence


If the seller has agreed to have some items fixed that were found during the initial home inspection, I always recommend double-checking any reported repairs by having your inspector perform a repair verification inspection as part of your due diligence process. You are required to perform your due diligence and the phrase “trust but verify” certainly applies here, especially if it was an expensive fix or a safety-related item. I have found on a few occasions some things that were not repaired properly, and sometimes the seller isn’t even aware of that fact.


What is a repair verification inspection

A repair verification inspection entails a second visit to the property by your inspector to assess the condition of items that the seller has agreed to have fixed. Your inspector will compare what he/she sees after the repair to what was present at the first inspection and then determine if the defect has been properly resolved.

After your home inspection has been completed and the report published, you will need to get together with your real estate agent and decide how you want to proceed. I strongly advise following your agent’s recommendations here, they are the experts when it comes to this stuff and they have your best interest in mind.


What should I have double-checked

After work has been completed, some items that need to be verified are mold remediation, sewer repairs, and electrical repairs, among others. Suppose mold was found during the initial inspection and subsequently remediated by a mold remediation contractor. In that case,  you must have the affected area tested again for the presence of mold to verify the effectiveness of the treatment. Two more big-ticket items that you will want to have verified are sewer line repairs and electrical work. Both often require special equipment to be used like a sewer scope camera or electrical outlet testers in order to inspect any repairs properly. 

A Sewer Scope Inspection inspects the sewer line that is between the home and the city main line under the street. A special camera system that uses a waterproof camera on the end of a long flexible fiber optic cable is fed through the line from an accessible cleanout location to determine the pipe material type and locate any problems with the line. Our sewer scope inspection report will contain a video of the inside of the sewer line as well as still images showing any damage that was found. If any damage is found we can determine its location and depth by using a locator that is designed to find the camera head inside the line.


What can a Sewer Scope Inspection find?

When I’m inspecting a sewer lateral line I’m looking at the inside of the line for any serious issues like cracks, breaks, clogs, defective pipe connections that could cause leaks, and roots that have found their way inside the line. I find cracks and roots to be the two most common issues while inspecting sewer lines in Orange County and L.A. County. Both are repairable by a qualified plumber either by digging up the problem area and replacing the line or by using a trenchless repair method. Commonly, the older vitrified clay lines have the most issues since they are brittle and have had decades of use. Having a sewer scope inspection performed is equally important when buying a new home as it is when buying an older home. It’s not just the decades-old homes that can have significant sewer problems, Occasionally brand new homes have issues as well. Improper bedding, crushed lines from careless installation, and construction debris are all defects that could be found at a newly constructed home.


Your sewer system requires maintenance too.

Like the rest of the home, your drain and sewer system require regular periodic maintenance; typically, this would consist of either a hydro-jet cleaning, which is a high-pressure wash of the inside of the line, or cleaning using rotating cutting blades. The type of line material will determine which cleaning method the plumber will use so as not to cause any undue damage to the line. Having your sewer system cleaned yearly will reduce the chances of having a serious backup by removing any invading root balls or problematic scale build-up from the pipe walls.


The benefit of a sewer scope inspection for a prospective homeowner is almost unmeasurable. Generally, there will be one of two outcomes from a sewer inspection. Either you will discover some issues that will empower you to make the appropriate decisions on how to move forward with your transaction and possibly start planning for repairs or, you will receive the peace of mind in knowing that you won’t have to stress over the possibility of a sewer problem if the inspection doesn’t reveal any significant problems. Honestly, I feel you can’t afford not to know the condition of your sewer line, considering how important it is to the functionality of your home.